Visão geral dos recursos
AdGuard VPN Browser Extension is available for Chrome, Firefox, Opera, and Edge. The UI and functionality doesn’t differ between browsers so the overview below will be relevant for AdGuard VPN extensions for all browsers.
You can only use AdGuard VPN Browser Extension when logged in. Sign in with your AdGuard account or via Google, Facebook, or Apple. In the latter case make sure that your account is bound to the same email address as your AdGuard account. If you have an AdGuard VPN subscription, it will be activated automatically in AdGuard VPN Browser Extension. Don’t have an AdGuard account yet? Create it here.
Saved locations
You can save your favorite locations for quick access. To do so, just hover over a location and click the bookmark icon that appears:
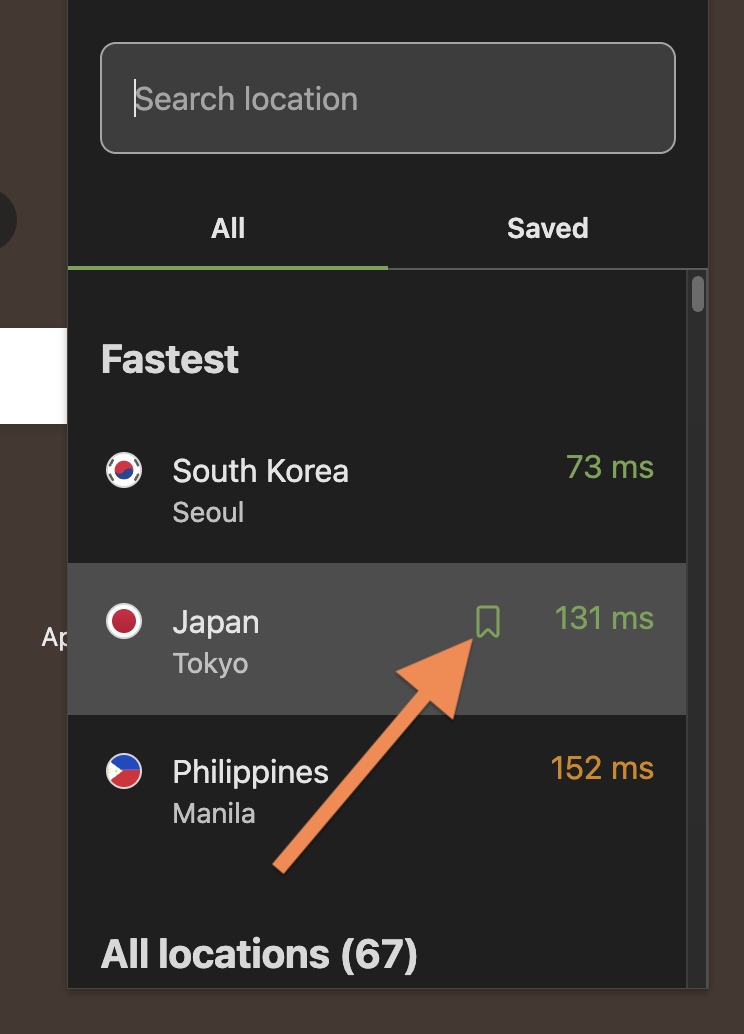
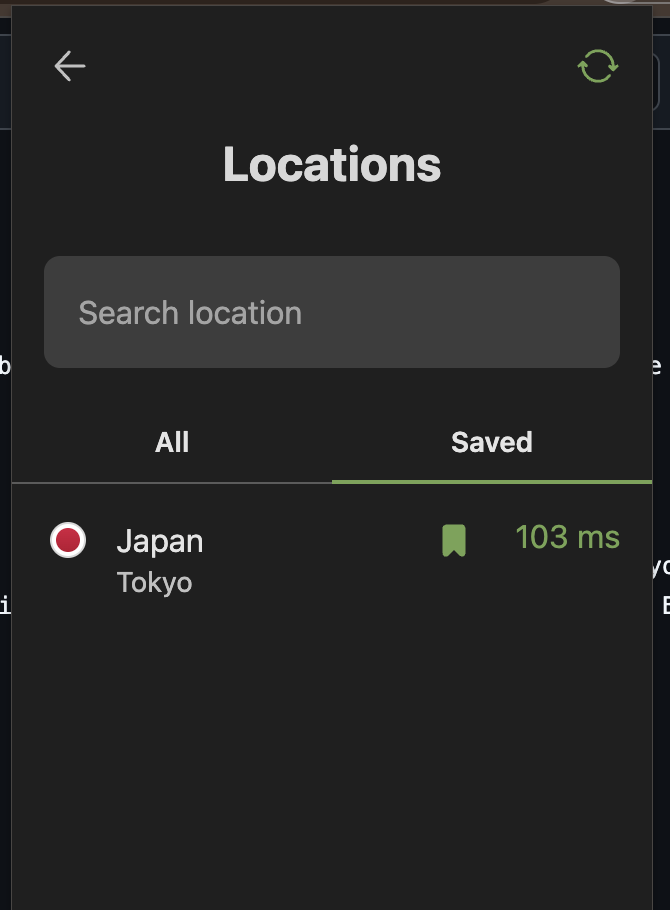
Your marked locations will then show up in the Saved tab.
Stats
The Stats section in the menu is a simple way to keep track of how much data passes through your VPN connection.

When stats can come in handy:
-
Check if the VPN is actually working. A quick look at the stats confirms that your connection is active and data is routed through the VPN.
-
Spot unexpected activity. If traffic grows while you’re idle, something in the background — a tab or an extension — might be sending data.
-
Troubleshoot slow connection issues. If your connection feels slow, a spike in traffic might point to something running or downloading in the background.
All statistics are stored locally on your device. We only calculate how much data is used — we don’t see what websites you visit. You can also disable statistics if you don’t need them.
The Stats section is available to users of the paid version.
Settings (for the active profile)
To manage your AdGuard VPN Browser Extension:
- Either click its icon on the browser’s panel, click the hamburger menu icon, and select Settings,
- Ou vá para a página Gerenciar extensões em seu navegador, clique em Detalhes abaixo de AdGuard VPN e gerencie suas configurações a partir daí.
Once done, you’ll see several tabs on the left:
Settings
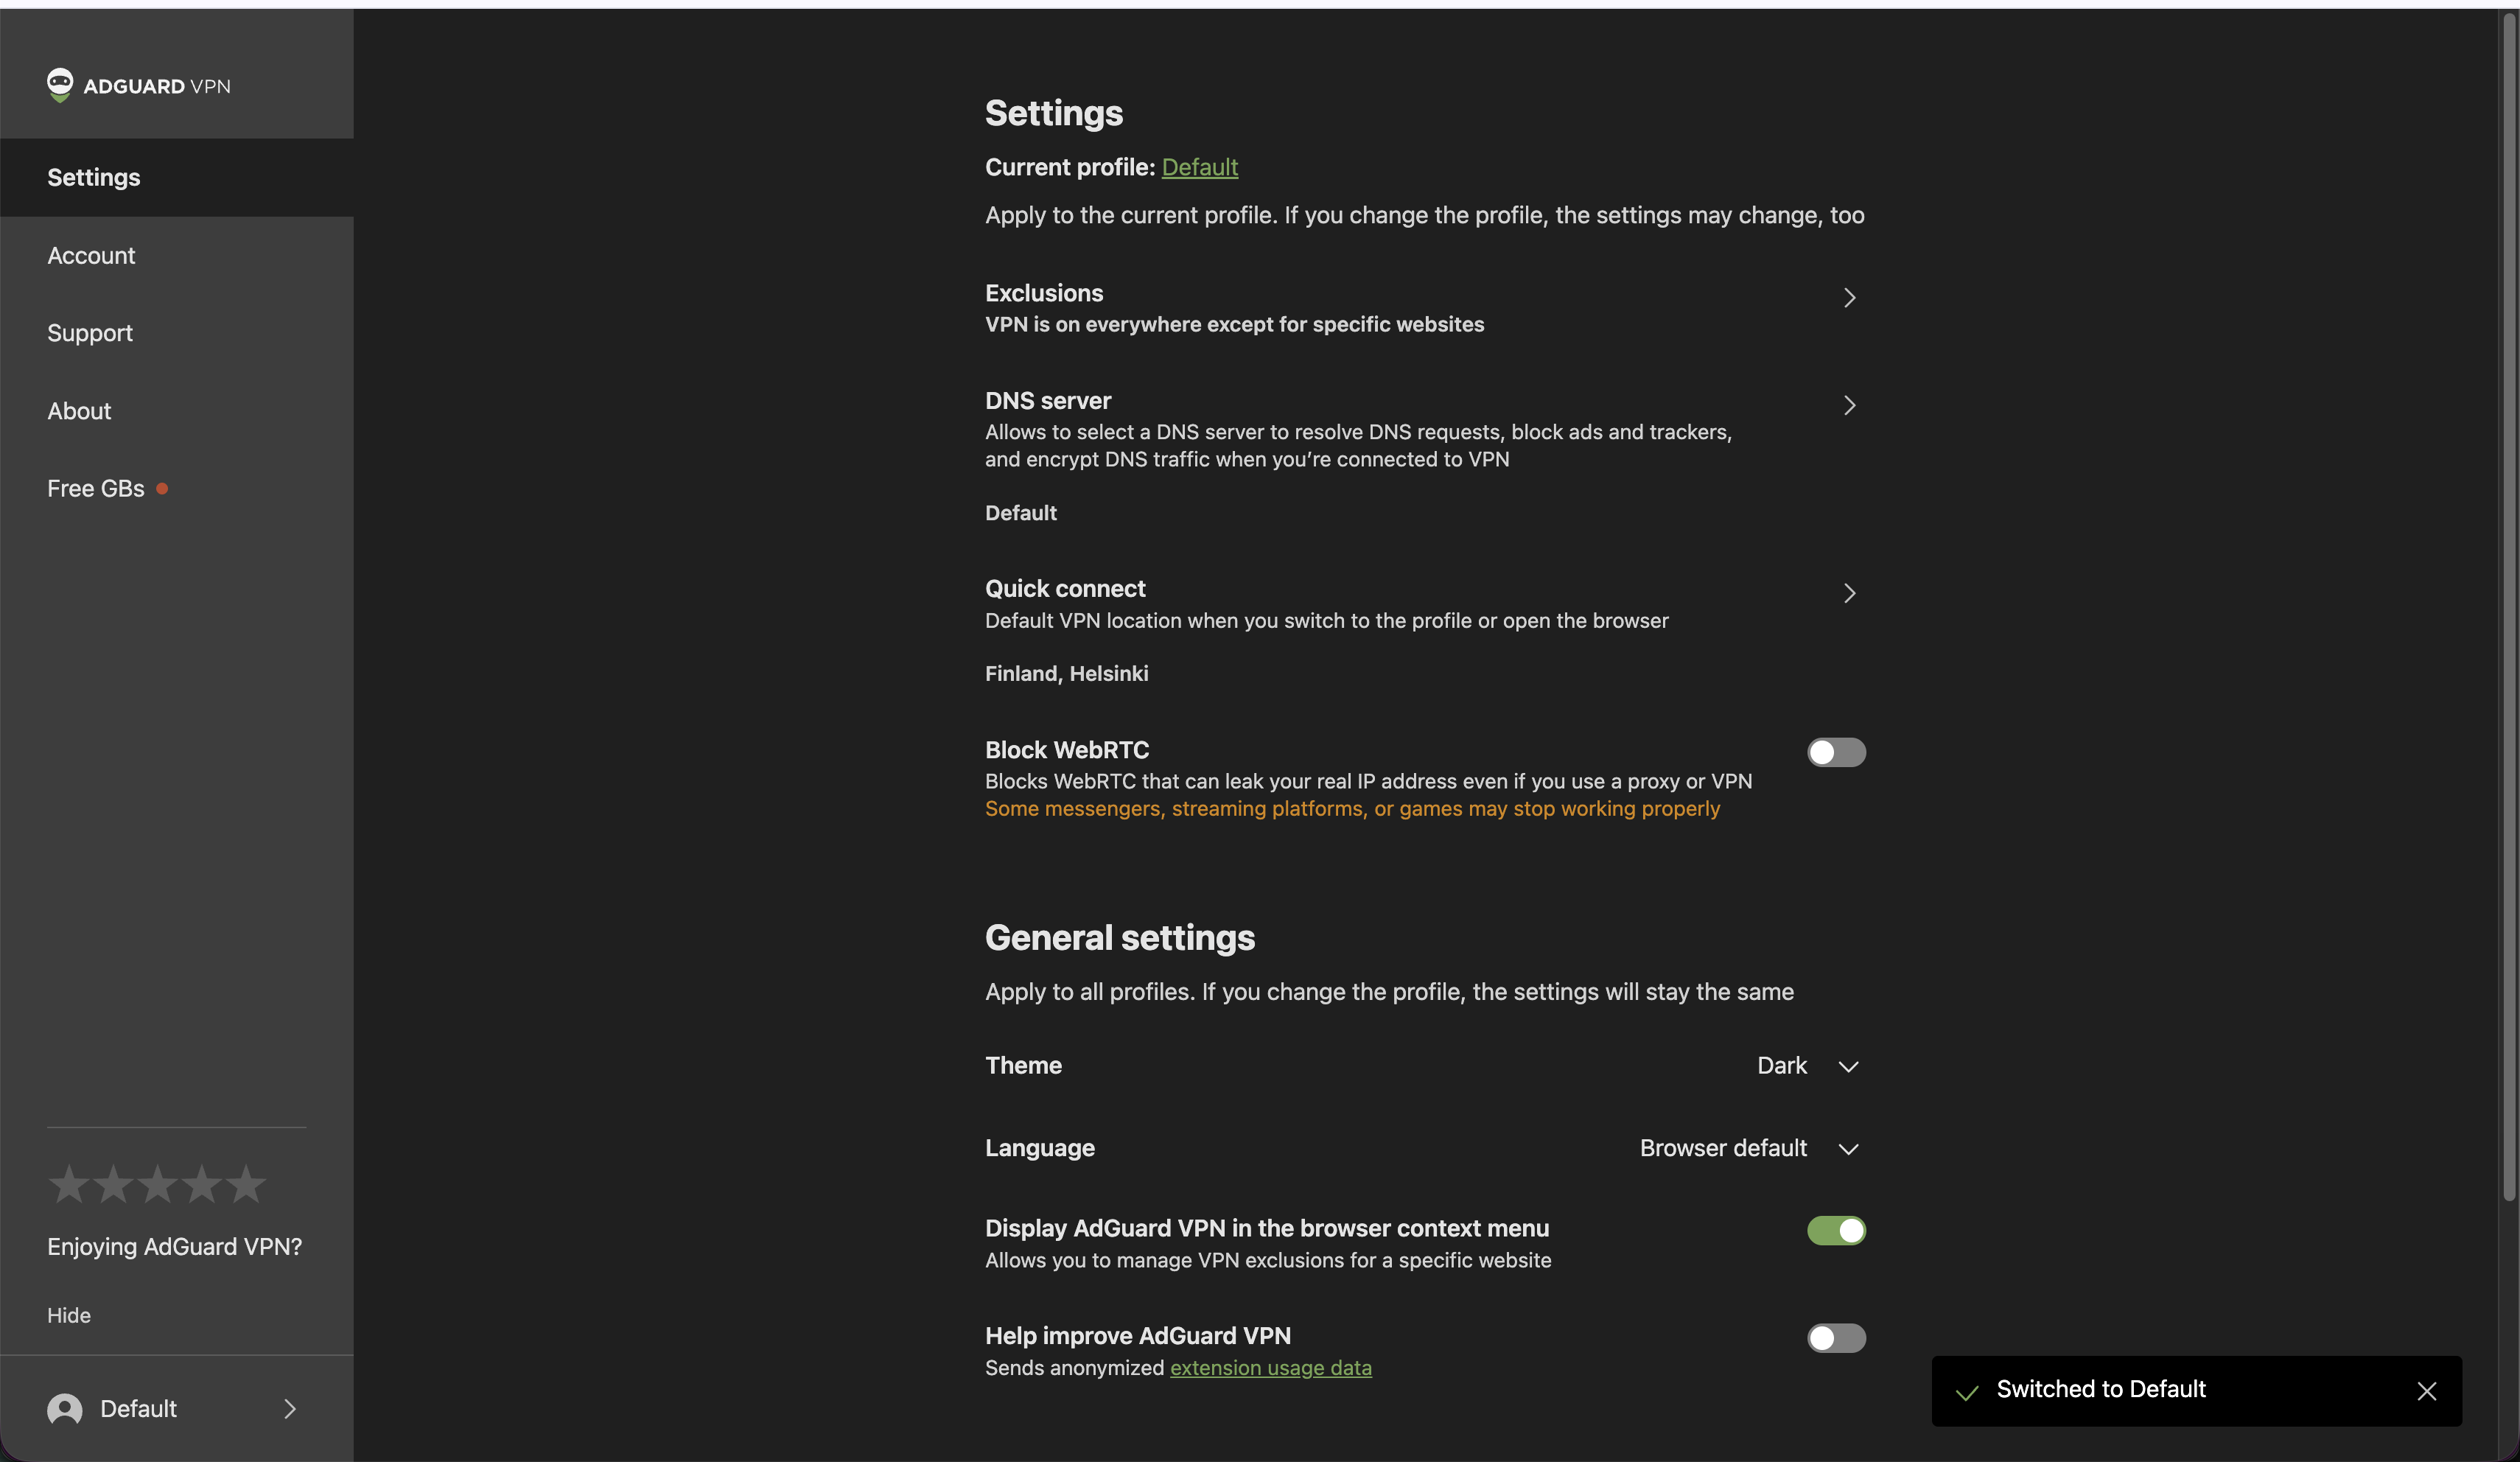
The Settings menu is divided into two distinct sections:
- Settings: Options here apply exclusively to the currently active profile: Exclusions, DNS server, Quick connect, and Block WebRTC.
- General settings: These parameters apply to the entire extension, regardless of which profile is selected: Theme, Language, Display AdGuard VPN in the browser context menu, and Help improve AdGuard VPN.
Exclusions
The Exclusions option allows you to configure website routing. You can choose between two options, each maintaining a separate list:
- VPN is on everywhere except for the websites below: AdGuard VPN works on all websites by default, with the exception of the domains added to this list.
- VPN is on selectively: only for the websites below: AdGuard VPN works only on the websites added to this list and remains inactive for all others.
When adding a website to an exclusions list, you can enter the domain manually or select the From the list option. It provides predefined categories (such as Shopping or Messengers) with popular services, allowing you to add all relevant domains for a service in one click.
Managing exclusions via the Settings tab applies the lists to the active profile. You can also configure exclusions for any profile under Manage profiles.
Import and export
Not only can you add and remove websites, you can also transfer ready exclusions lists to other devices where AdGuard VPN is installed. To export your exclusions list, follow the 4-step instruction below:
- Open AdGuard VPN Browser Extension from where you want to export your exclusions lists. Find the appropriate section and click the Export button. O arquivo
exclusions.zipserá baixado. - There are two
.txtfiles inside the archive, one for each of the two exclusions lists. Adicione mais exclusões a eles, exclua os existentes, renomeie arquivos ou apenas deixe o arquivo como está. - Ao transferir entre dispositivos diferentes, envie o arquivo
.zipao dispositivo para importar. - Abra o AdGuard VPN nesse dispositivo. Find the appropriate section, click the Import button and select the archive.
Done!
DNS server
By default, the AdGuard DNS Non-filtering server is selected to ensure privacy without interfering with website content. If you want additional protection, you can choose a DNS server that blocks ads, trackers, or malicious domains, or enables parental control. Brief descriptions under the names of DNS servers will help you navigate and make your decision.
Learn more about DNS servers from various providers.
Configuring DNS server directly in the Settings tab applies the selected server to the active profile. You can also assign a preferred DNS server to any profile under Manage profiles.
Quick connect
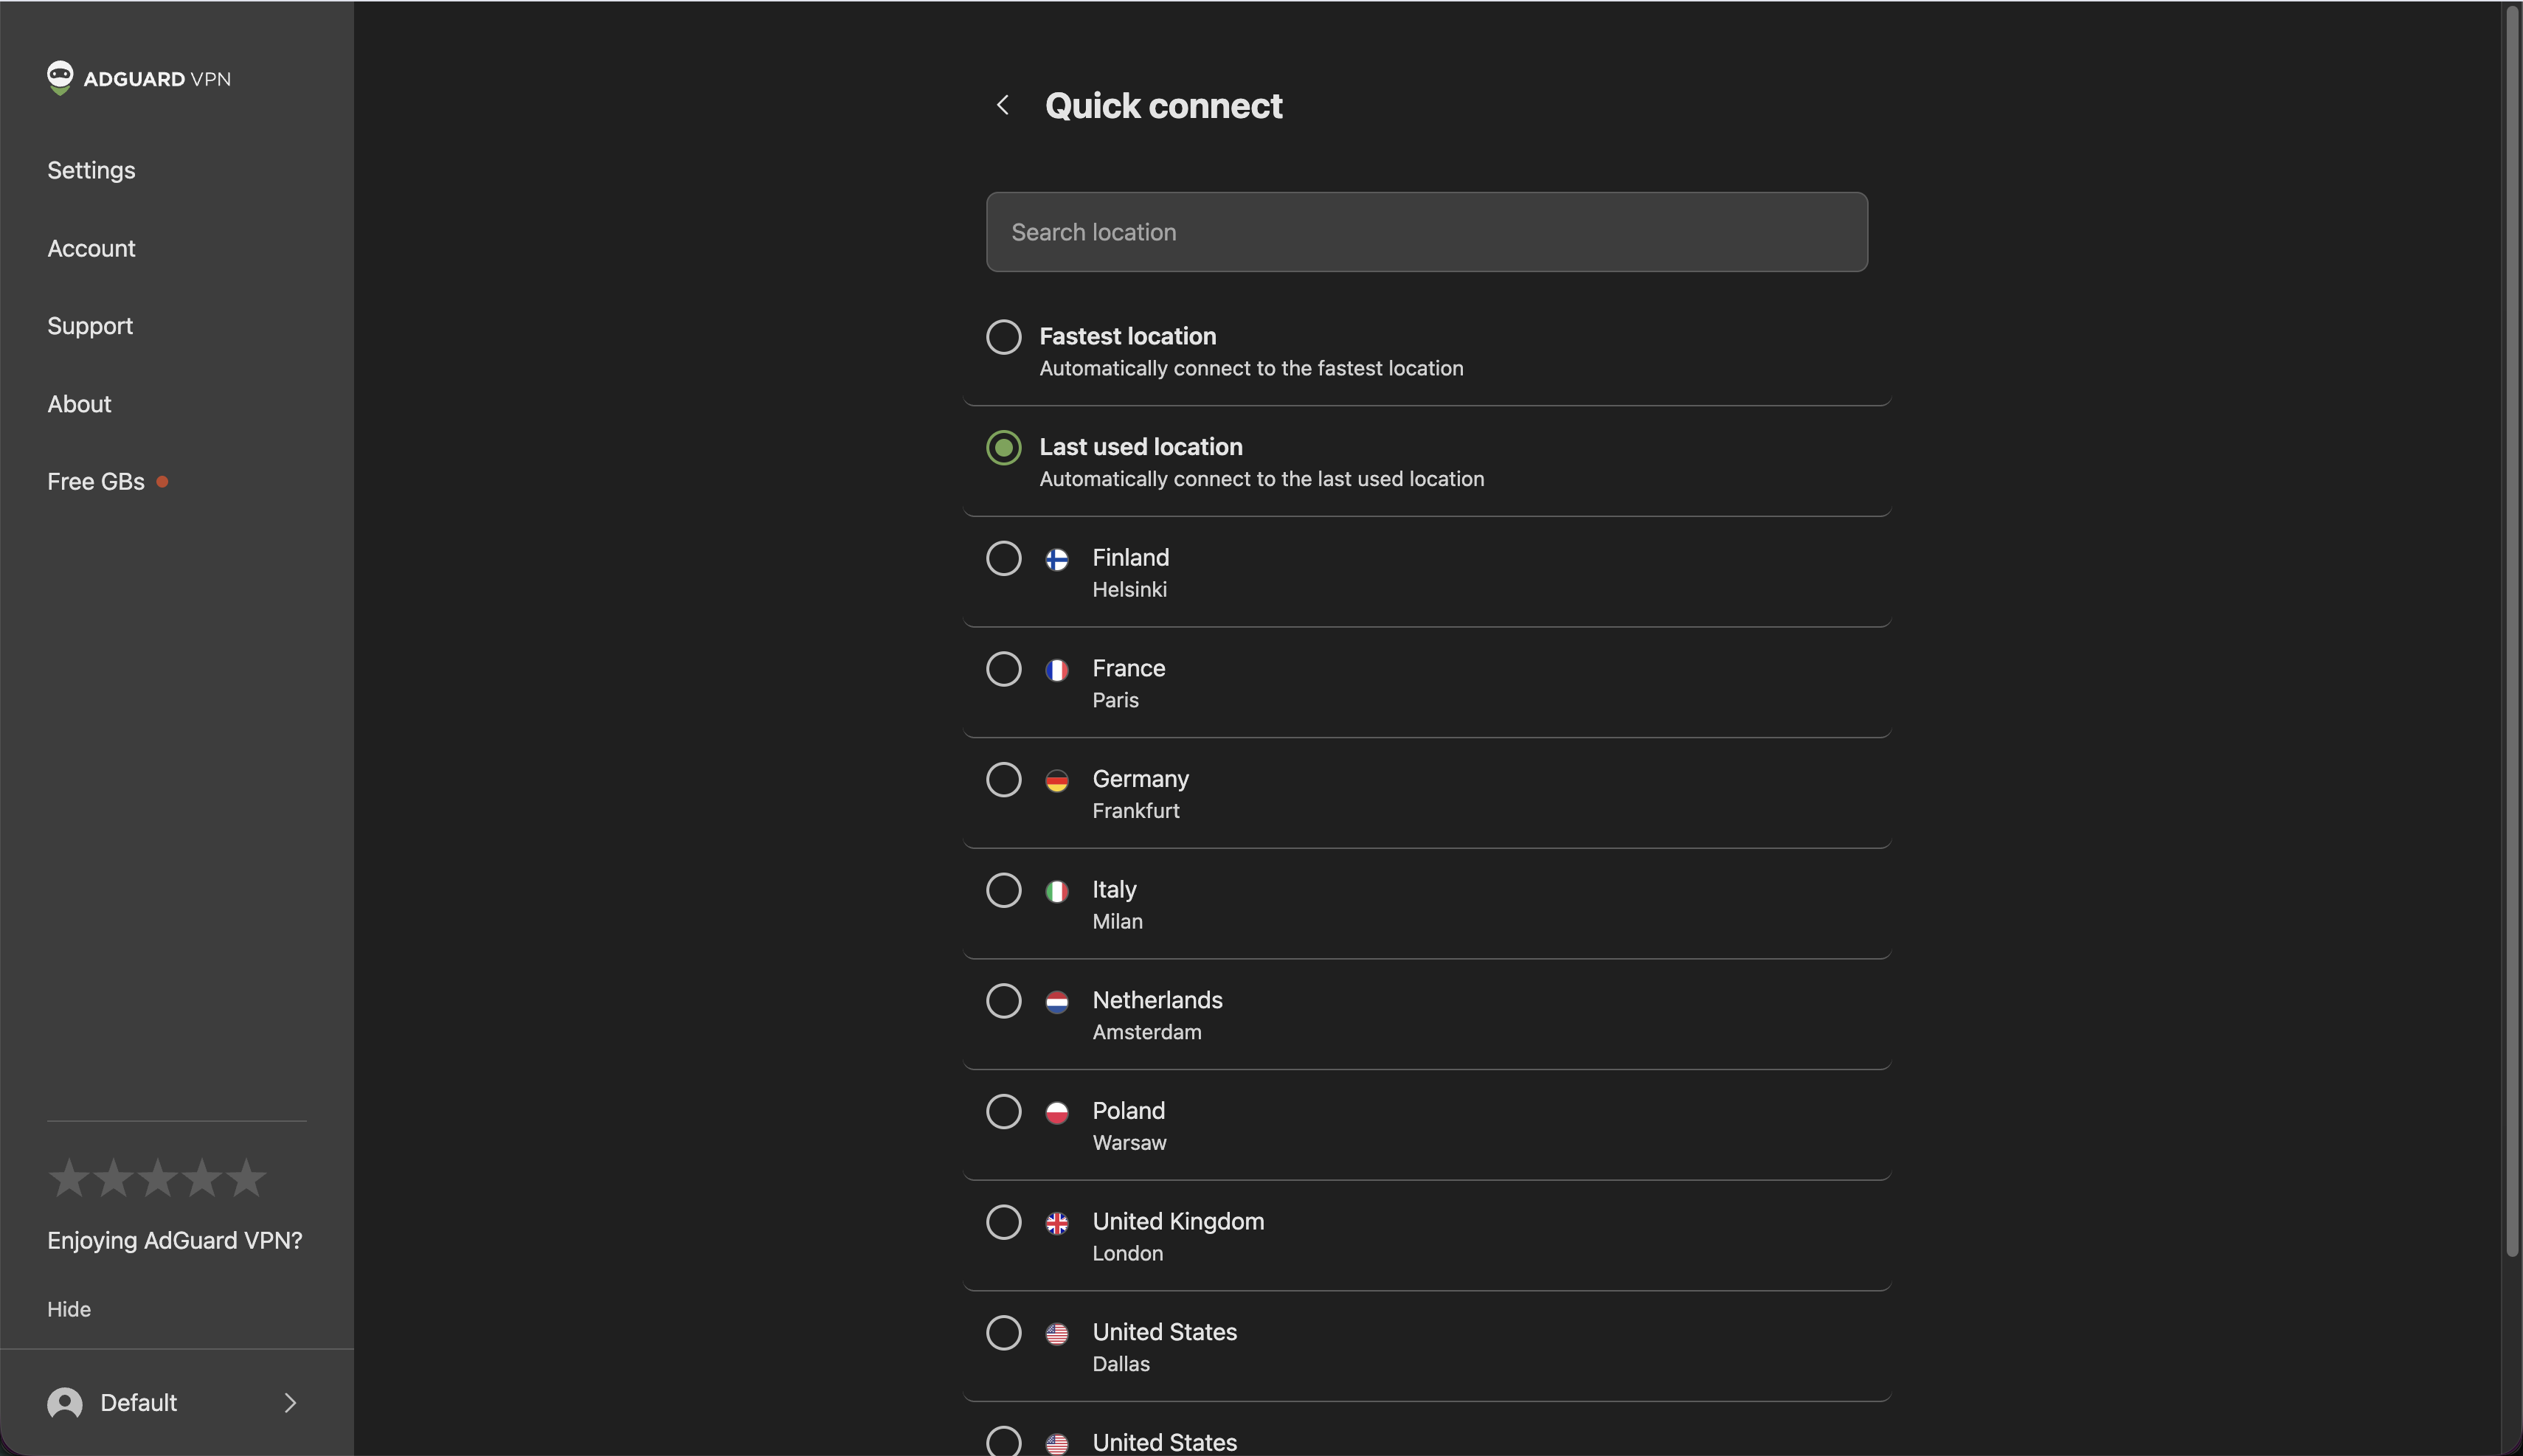
The Quick connect section defines which location the extension connects to when clicking the main Connect button:
- Fastest location
- Last used location
- Specific countries and servers
Configuring Quick connect directly in the Settings tab applies these parameters to the active profile. You can also set a preferred connection location for any profile under Manage profiles.
Block WebRTC
This feature blocks WebRTC, which can leak your real IP address even when using a proxy or VPN. Some messengers, streaming platforms, or games may stop working properly with this option enabled.
Toggling Block WebRTC directly in the Settings tab applies this setting to the active profile. You can also enable or disable WebRTC blocking for any profile under Manage profiles.
General settings
The options in this section apply globally to the entire extension, regardless of which profile is selected:
- Theme: Select a preferred interface appearance: Light, Dark, or Browser default.
- Language: Change the display language of the extension.
- Display AdGuard VPN in the browser context menu: Toggle quick access to AdGuard VPN actions from the browser’s right-click menu.
- Help improve AdGuard VPN: Enable sending crash reports and technical data to help improve extension performance and stability. All data is collected anonymously, is never shared with third parties, and you can withdraw your consent at any time.
Manage profiles
To create, edit, or delete profiles, open the profile switcher in the bottom-left corner of the sidebar and select Manage profiles.
You can have up to 10 profiles, including the Default profile.
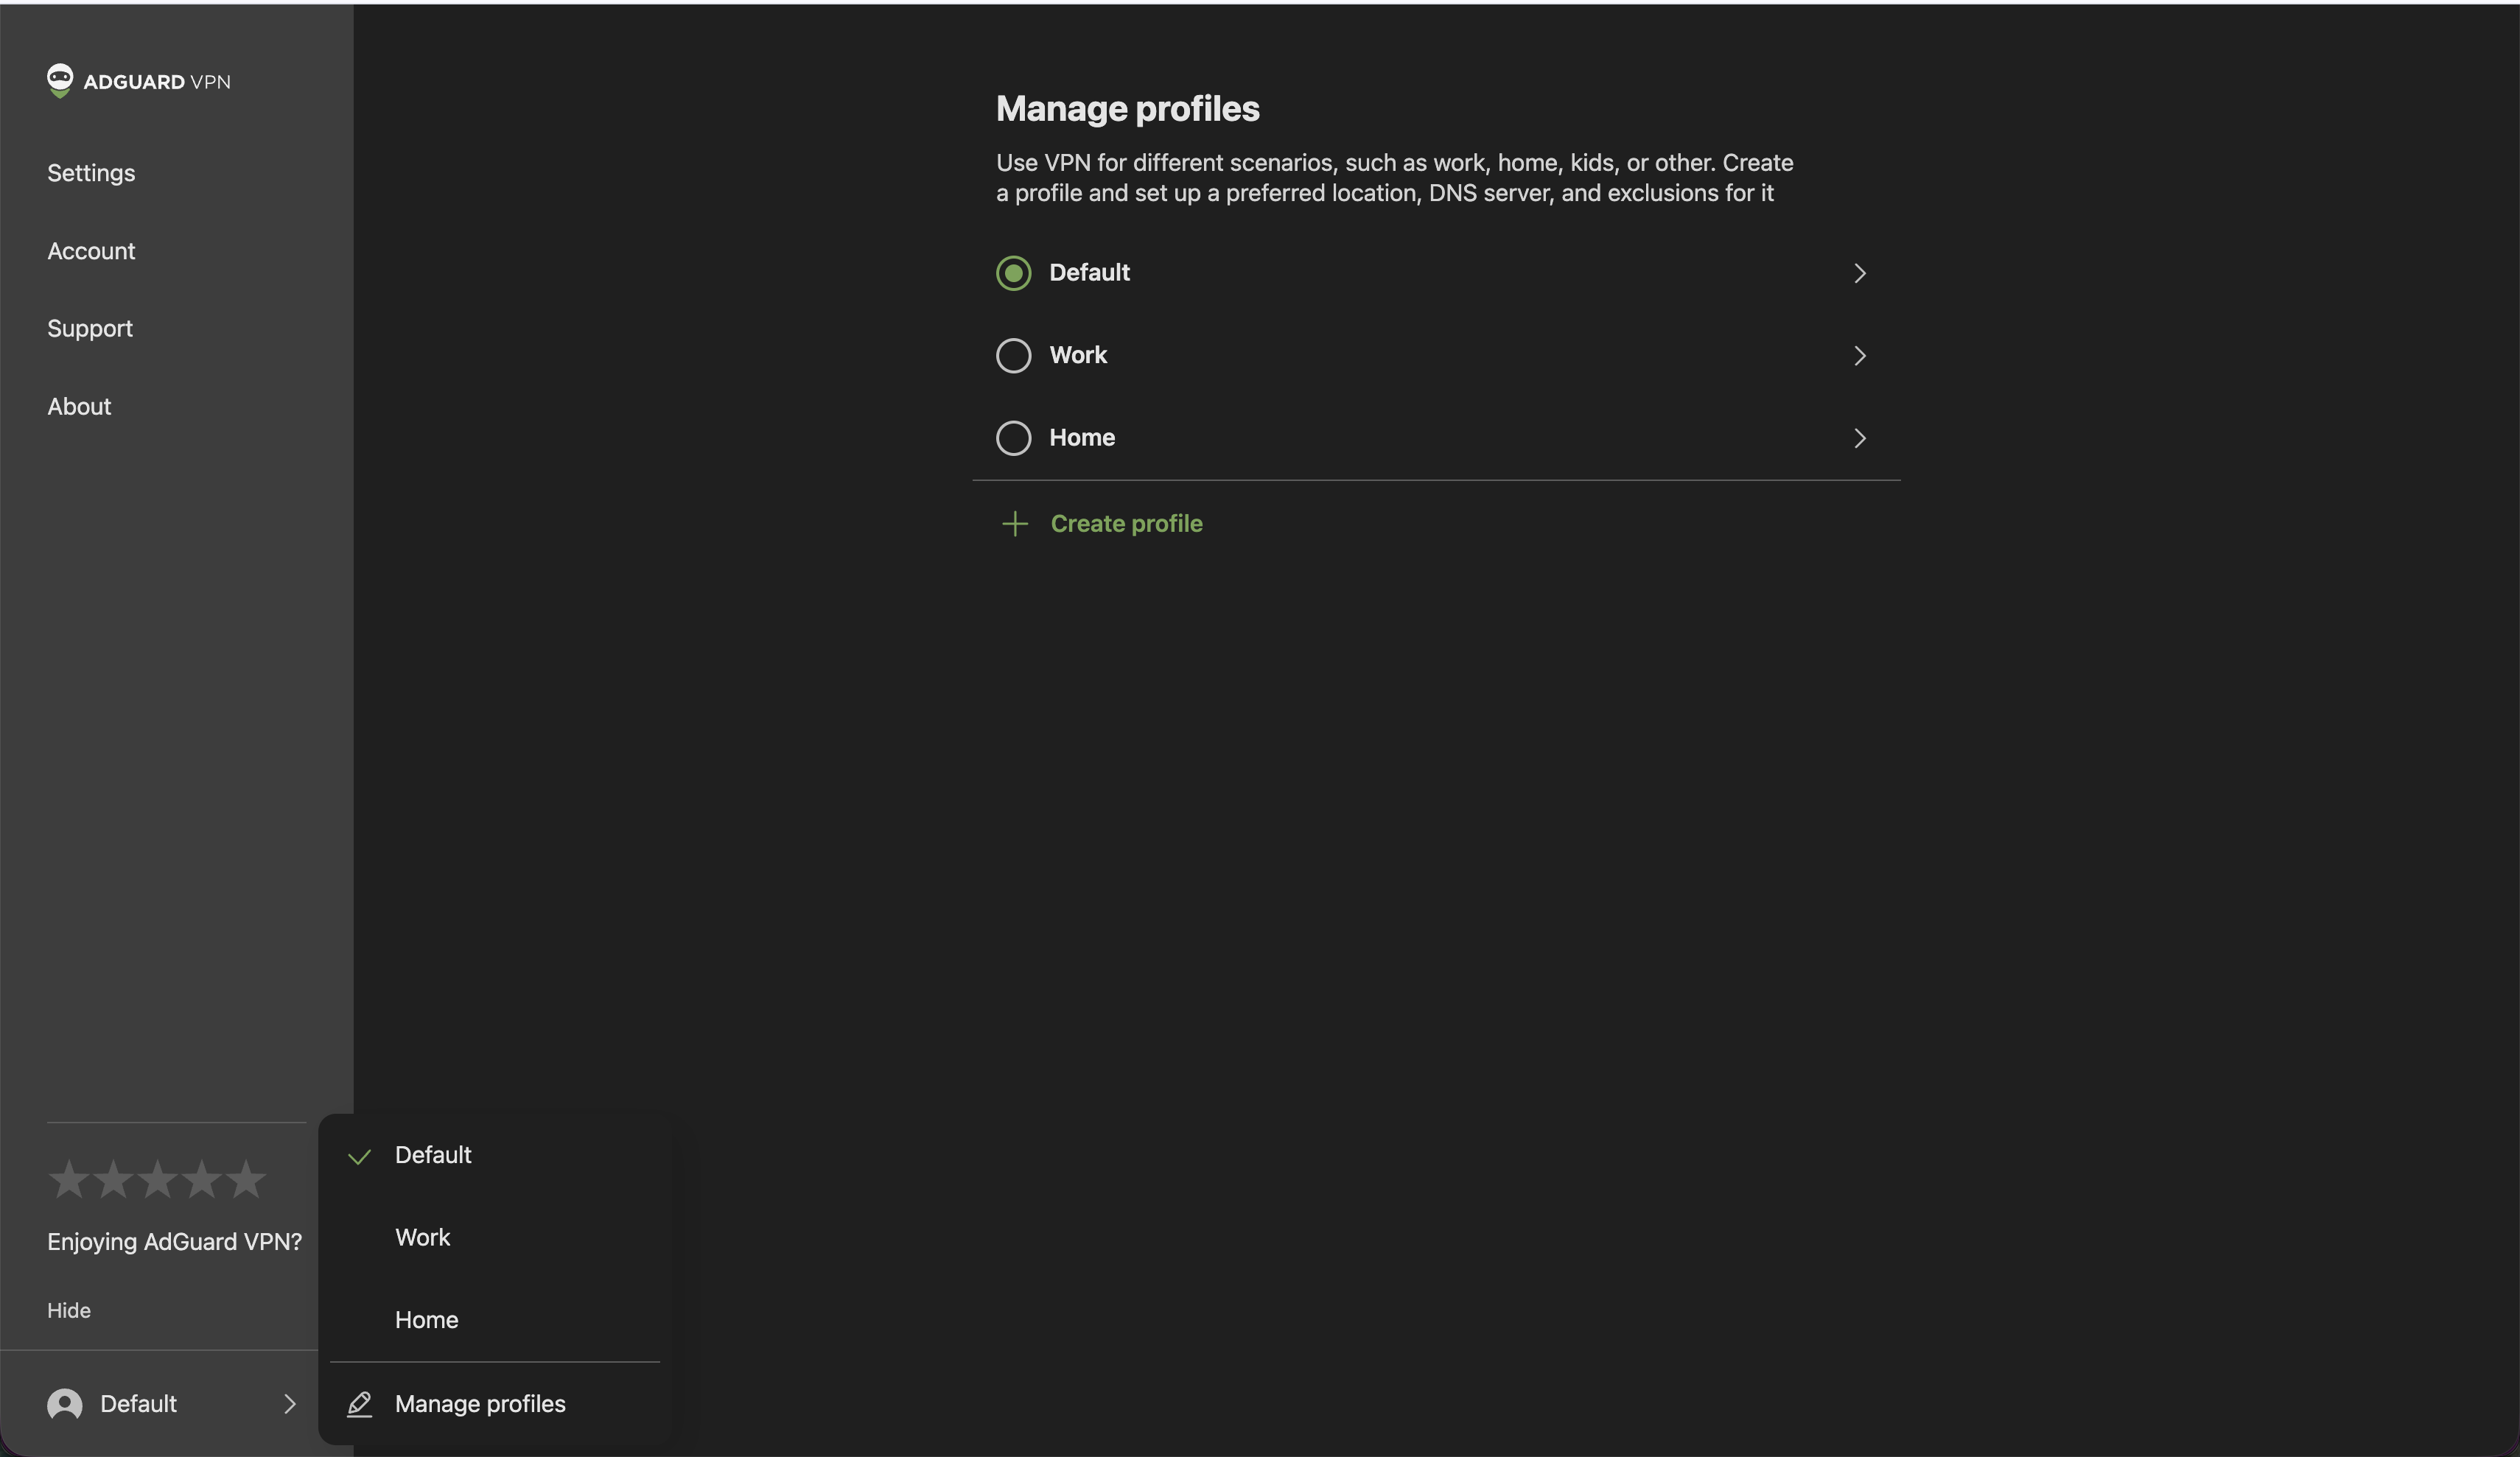
In this view, you can rename profiles, delete setups you no longer need, and configure the following parameters for each profile individually:
- Quick connect: Set the default connection behavior (Fastest location, Last used location, or a specific country and server).
- DNS server: Select a dedicated DNS provider or keep the default server (AdGuard DNS Non-filtering).
- Block WebRTC: Enable or disable WebRTC blocking to prevent IP leaks.
- Exclusions: Set up a custom exclusions list and select a routing mode for that profile.
The Default profile is protected and cannot be renamed or deleted.
Account
The third tab of AdGuard VPN Browser Extension is utterly minimalistic, containing only the email address you used to sign into your account and two buttons, Manage and Sign out. Clicking the Manage button takes you to your personal AdGuard account, where you can see all your current licenses and subscriptions, as well as devices connected to them.
Support
You can find answers to common questions in the FAQ section, or leave feedback: report a bug if something isn’t working as it should, suggest adding a new feature, or discuss AdGuard on any of the many social media platforms.
About
Another minor tab, where you can check the extension’s version, visit the official website, and view the EULA or Privacy policy.